

8 DIY Kitchen Island Wainscoting Ideas on a Budget
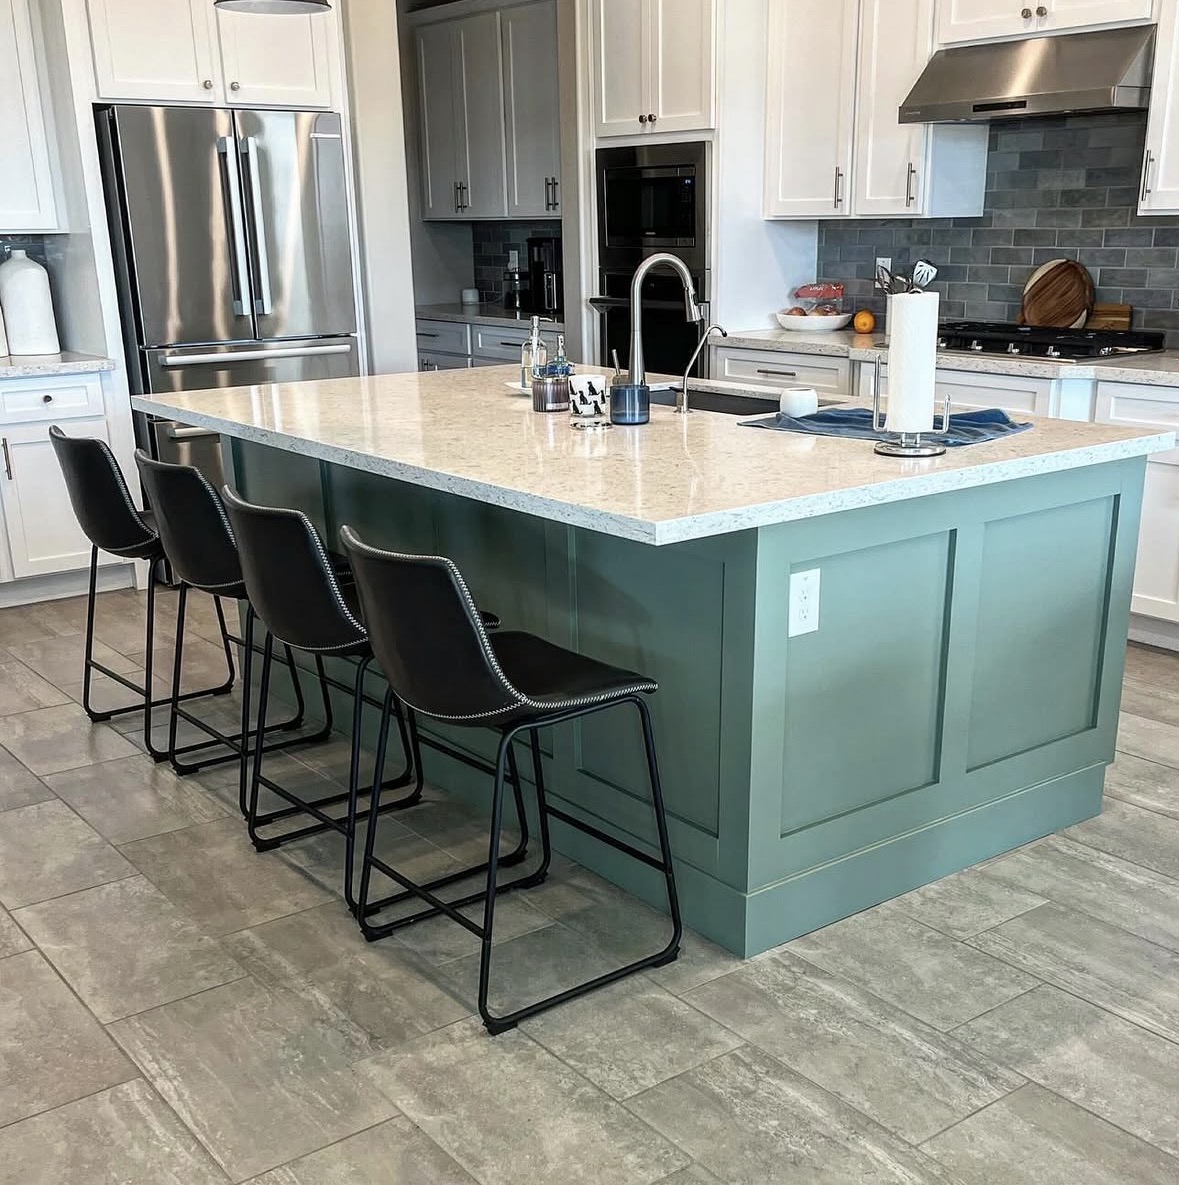
Your kitchen island doesn’t have to look plain or boring.
Sometimes, a few simple changes can make it look like a custom piece of furniture without spending hundreds of dollars on a new one.
One of my favorite ways to upgrade a basic kitchen island is with wainscoting. It adds texture, character, and a finished look to the island.
The best part? You can create a beautiful design with affordable materials, a little patience, and some basic DIY skills.
Whether you love modern farmhouse kitchens, classic white cabinets, cozy cottage styles, or clean and modern spaces, there is a wainscoting idea that can work for your home.
You don’t need a huge kitchen or an expensive remodeling budget, either. Even a small kitchen island can look more stylish with the right trim and paint.
In this guide, you’ll find eight DIY kitchen island wainscoting ideas on a budget.
Each idea is easy to picture, simple to customize, and suitable for homeowners who want a fresh look without overspending.
1. Add Simple Picture Frame Wainscoting
If you want your kitchen island to look elegant without spending too much, picture frame wainscoting is a great place to start.
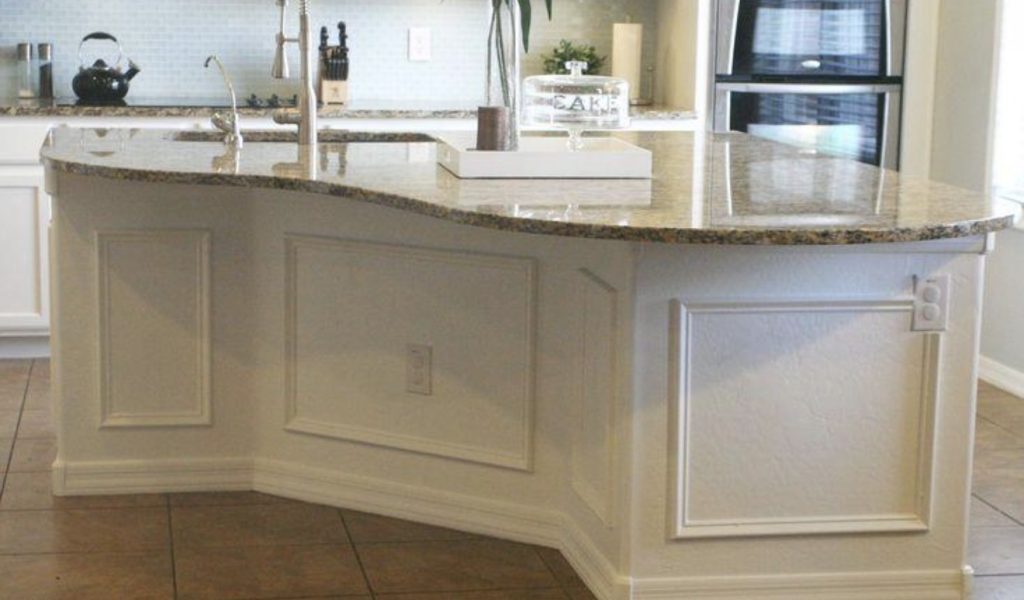
This design uses narrow strips of trim to create rectangular frames on the sides of the island. It looks detailed and expensive, but the design itself is surprisingly simple.
You don’t need complicated woodworking skills to pull it off. Lightweight wood trim or paintable molding can help you get the look without buying costly decorative panels.
How to create the look on a budget
Start by measuring the visible sides of your kitchen island. Decide how many rectangular frames you want on each side. Two large frames can look beautiful on a small island, while three or four narrower frames may work better on a longer one.
Cut your molding to size and arrange the pieces into rectangles. Use a level and measuring tape to keep everything straight. Attach the trim with an adhesive suitable for your island’s surface, adding finishing nails if appropriate.
Fill the nail holes and corner gaps with paintable filler or caulk. Sand any rough spots, then paint the trim and island in the same color for a seamless finish.
White, warm cream, and soft greige are lovely choices for a traditional kitchen. If you prefer a modern farmhouse look, try a muted sage green or a deep charcoal shade.
Budget tip: Use simple, narrow molding instead of ornate trim. You can still achieve an elegant look without paying for expensive decorative pieces.
This style works especially well in traditional, transitional, and modern farmhouse kitchens.
Check out these above toilet wainscoting bathroom wall decor ideas that don’t cost much.
2. Use Inexpensive MDF Strips for a Modern Look
Do you like a clean kitchen with a little architectural detail? Try using MDF strips to create a simple batten-style design on your kitchen island.
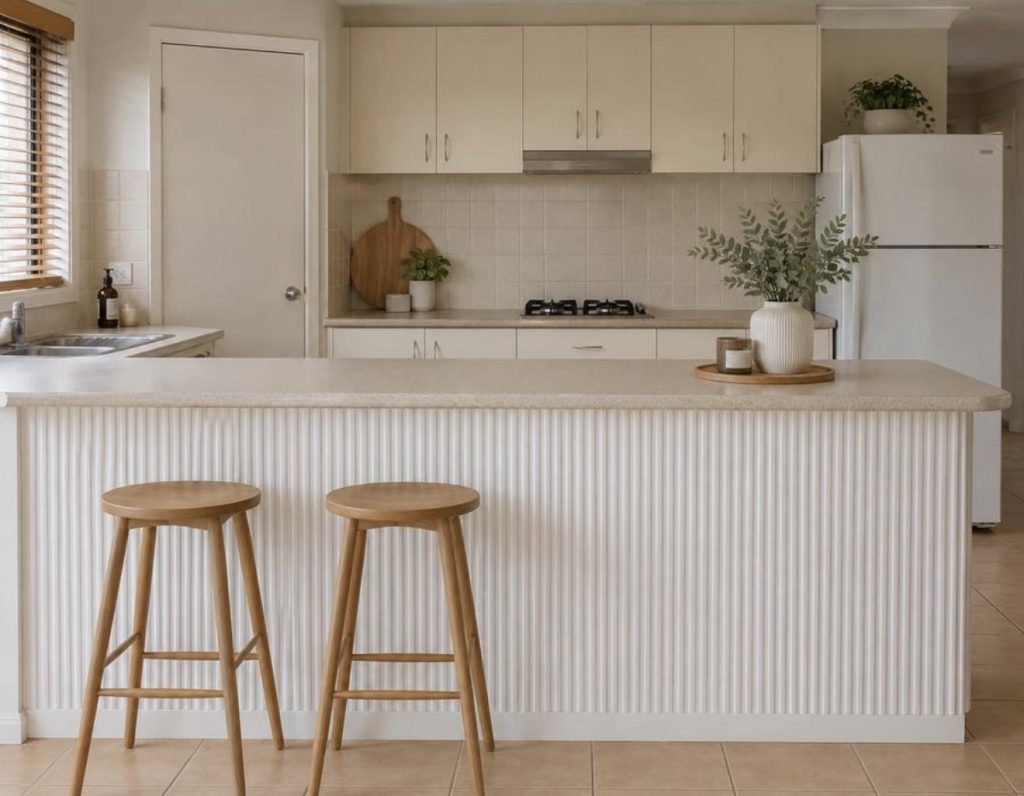
MDF, or medium-density fiberboard, is often used for interior trim because it has a smooth surface that takes paint well. It can be an affordable alternative to buying ready-made decorative panels.
This idea is particularly useful if your current island has a plain, flat front that needs more personality.
How to create the look on a budget
Measure the front and sides of your island. Cut MDF strips to your preferred length and width, then plan their spacing before attaching them.
For a balanced look, keep the gaps between the strips consistent. You can place the strips vertically across the island’s front to create a subtle, structured appearance.
Attach them with an appropriate construction adhesive and finishing nails if your island’s material allows it. Fill the holes, sand the edges, and apply a suitable primer before painting.
Choose the same color as your existing cabinets if you want the island to blend in. Alternatively, paint the island a contrasting color to make it stand out.
For example, a white kitchen with a soft navy island can look polished without requiring expensive materials.
Budget tip: Buy primed MDF trim when the price makes sense. It can reduce preparation time, although you should still follow the manufacturer’s painting instructions.
Keep MDF away from areas where water may collect, and seal painted surfaces properly. Moisture-resistant products may be more suitable for kitchens, but they still need protection from standing water.
This is a good option for anyone who wants a simple, contemporary island makeover.
3. Install Beadboard Panels for a Cozy Farmhouse Kitchen
Beadboard is a lovely choice if you want your kitchen to feel warm, welcoming, and a little more traditional. It has narrow vertical grooves that add texture without making the island look too busy.
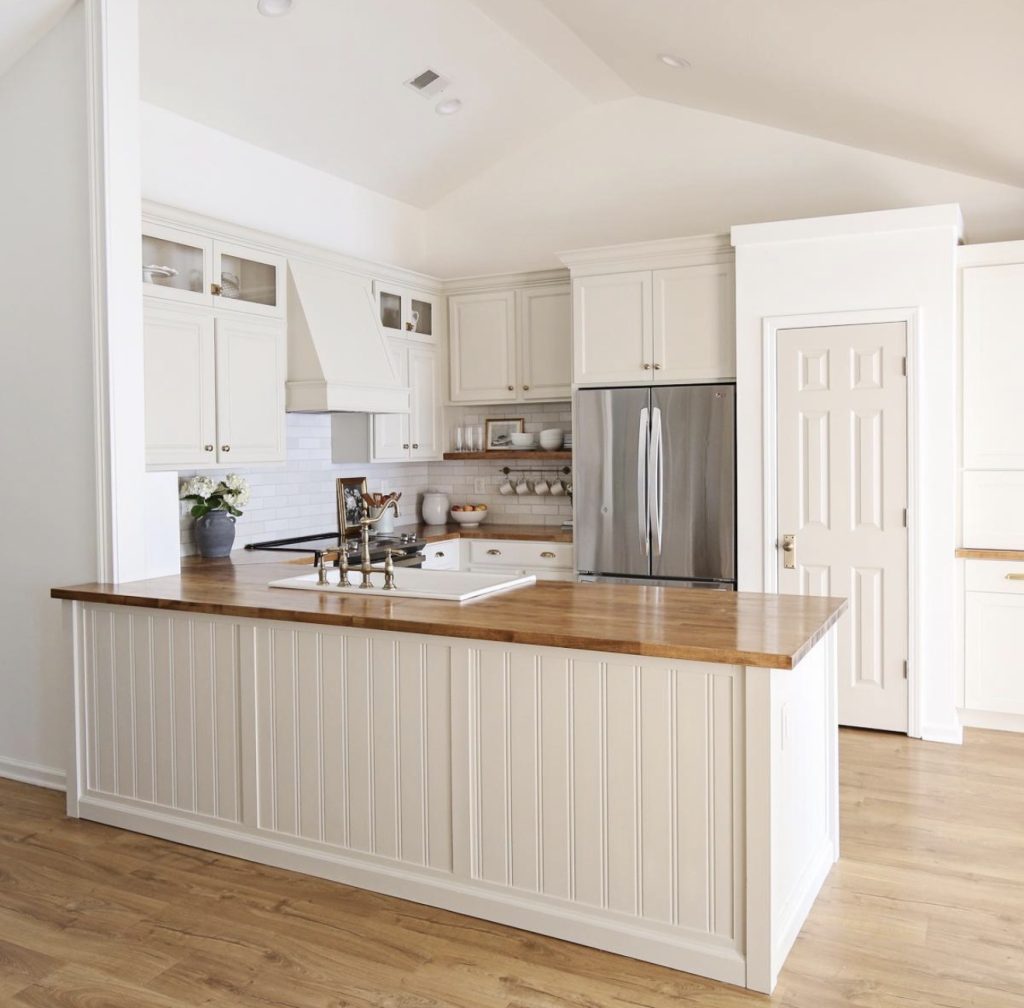
This style works beautifully in farmhouse, cottage, coastal, and vintage-inspired kitchens. It can also help a plain island feel more like a custom piece of furniture.
The good news is that you don’t have to install individual wooden boards to get the look. Beadboard sheets or panels can make the job easier, depending on the size and shape of your island.
How to create the look on a budget
Measure the back and sides of your island, then look for paintable beadboard panels at your local home improvement store. Choose panels that are suitable for interior cabinetry and the conditions in your kitchen.
Cut the panels to fit the exposed surfaces. Attach them according to the manufacturer’s instructions, using compatible adhesive or appropriate fasteners.
Finish the edges with simple trim so the panels look neat. Fill any visible gaps, prime where needed, and paint everything in a coordinated color.
White beadboard paired with butcher block countertops creates a classic farmhouse look. If your kitchen already has white cabinets, consider a pale blue, sage green, or warm beige island for a little contrast.
Budget tip: Focus on the back of the island first if that is the largest unfinished surface. You can always add panels to the sides later.
Beadboard is particularly useful for covering a large, plain area without having to measure and attach lots of individual trim strips. Just remember to seal the edges properly, especially near the floor, where spills and mop water can collect.
Check out these feminine kitchen island ideas that look cozy and classy.
4. Create Board and Batten Wainscoting With Basic Wood Strips
Board and batten is another budget-friendly way to give your kitchen island more character. It combines flat boards or a smooth backing surface with vertical strips that create a repeating pattern.
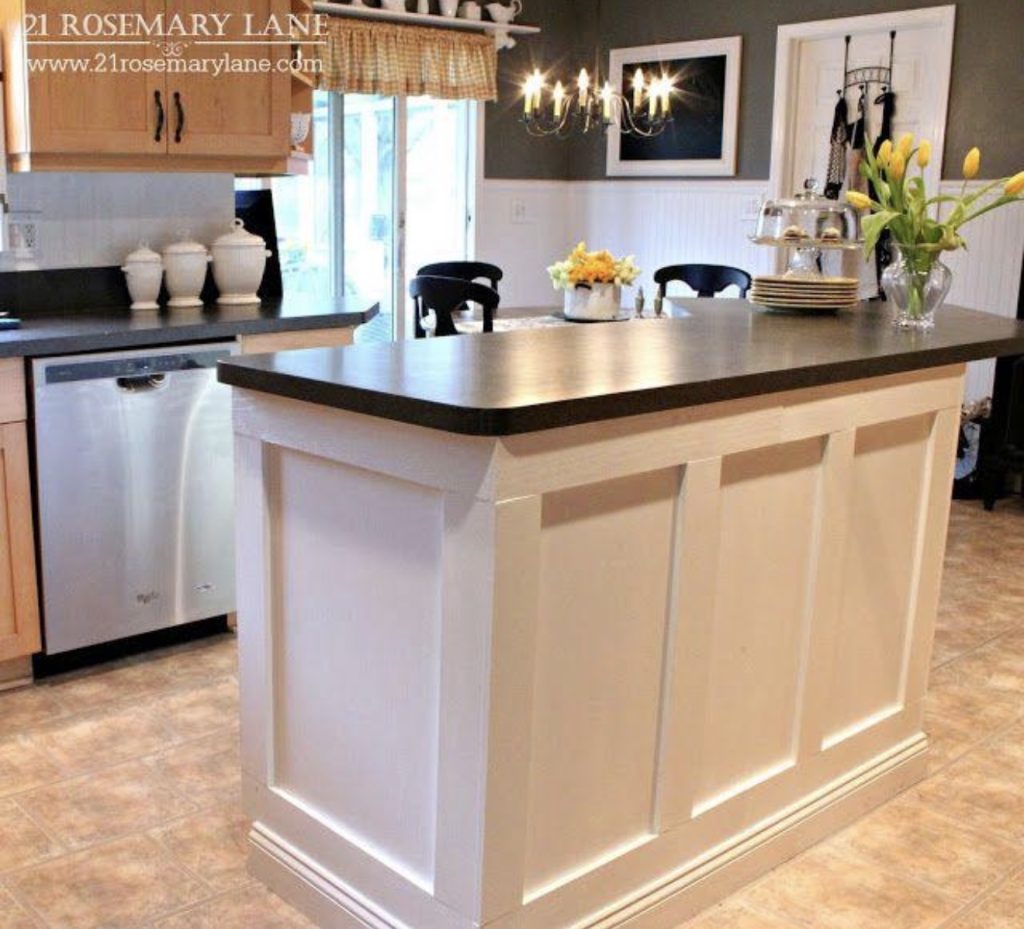
The result is simple, structured, and stylish. It looks right at home in modern farmhouse kitchens, but you can also use it in transitional or contemporary spaces.
I especially like this idea for a larger island because the vertical lines make the front look more detailed without needing ornate decoration.
How to create the look on a budget
Start with a smooth island surface. If the existing surface is already flat and in good condition, you may be able to attach the battens directly. If it is heavily textured or uneven, a suitable backing panel may give you a cleaner finish.
Measure the island and decide how many vertical strips you want. Mark their positions with a pencil, checking that the spacing is even.
Cut your strips to length, then attach them with suitable adhesive and fasteners for the surface. Add horizontal trim at the top or bottom if you want a more finished appearance.
Once everything is secure, fill the holes, caulk small paintable gaps, and sand the surface. Apply primer and paint to complete the look.
For colors, consider soft sage, warm white, navy blue, or mushroom brown. These shades work well with many common kitchen finishes.
Budget tip: Use inexpensive, straight wood strips instead of elaborate molding. You can get a beautiful result from a simple pattern and a good paint finish.
If you’re working with MDF, avoid leaving its edges exposed to moisture. Seal and paint them carefully, and choose a more moisture-tolerant material where water exposure is likely.
5. Give Your Kitchen Island a Shiplap Wainscoting Makeover
If you love farmhouse kitchens but want something a little more relaxed than picture frame molding, try shiplap-style wainscoting.
Shiplap uses horizontal boards or panels with narrow gaps between them. The lines add texture and make a basic kitchen island feel more intentional.
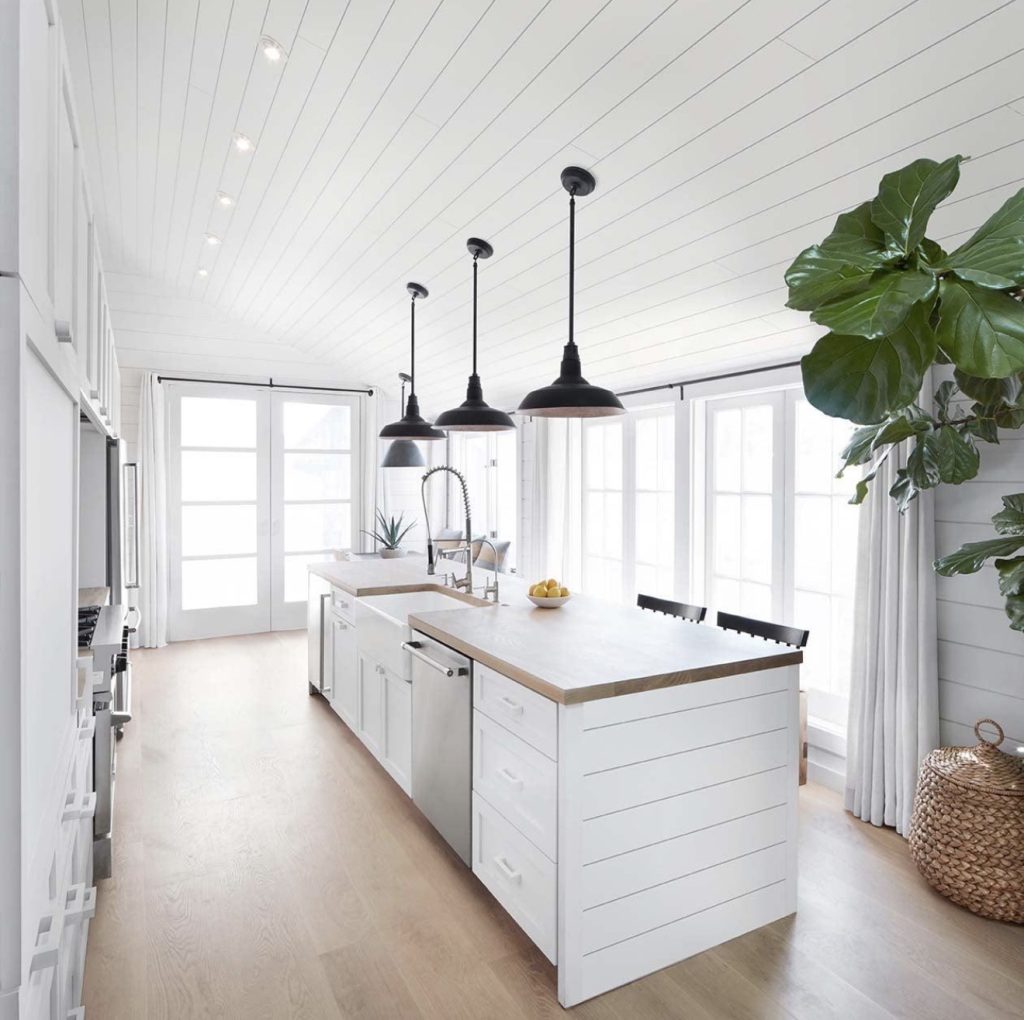
This idea works particularly well on the back of an island with seating. It gives the side facing the dining area a finished appearance and looks great in photos.
How to create the look on a budget
You can use thin wood boards, suitable paneling, or narrow strips attached horizontally to a flat backing surface. The best choice depends on the existing island, your budget, and how much thickness you can add.
Measure the height and width of the area you want to cover. Decide whether you want narrow boards for a subtle look or wider planks for a more noticeable pattern.
Install the boards in level horizontal rows. Use consistent spacing so the lines look intentional. If you’re using individual boards, small spacers can help keep the gaps uniform.
After installation, fill any nail holes and sand rough edges. Paint the surface in a durable finish designed for interior trim or cabinetry.
White shiplap creates a bright, airy farmhouse look. Natural-looking wood tones can add warmth, while charcoal or dark green gives the island a more dramatic appearance.
Budget tip: You don’t have to cover every side. Adding shiplap to the largest visible surface can create the look without buying extra material.
One important detail: don’t make the gaps so deep that they become difficult to clean. Kitchen islands collect crumbs, fingerprints, and splashes, so a practical finish matters just as much as the design.
6. Make a Classic Shaker-Style Island With Flat Trim
Shaker-style cabinetry is popular because it looks clean and timeless. It features simple, square-edged frames rather than complicated decorative details.
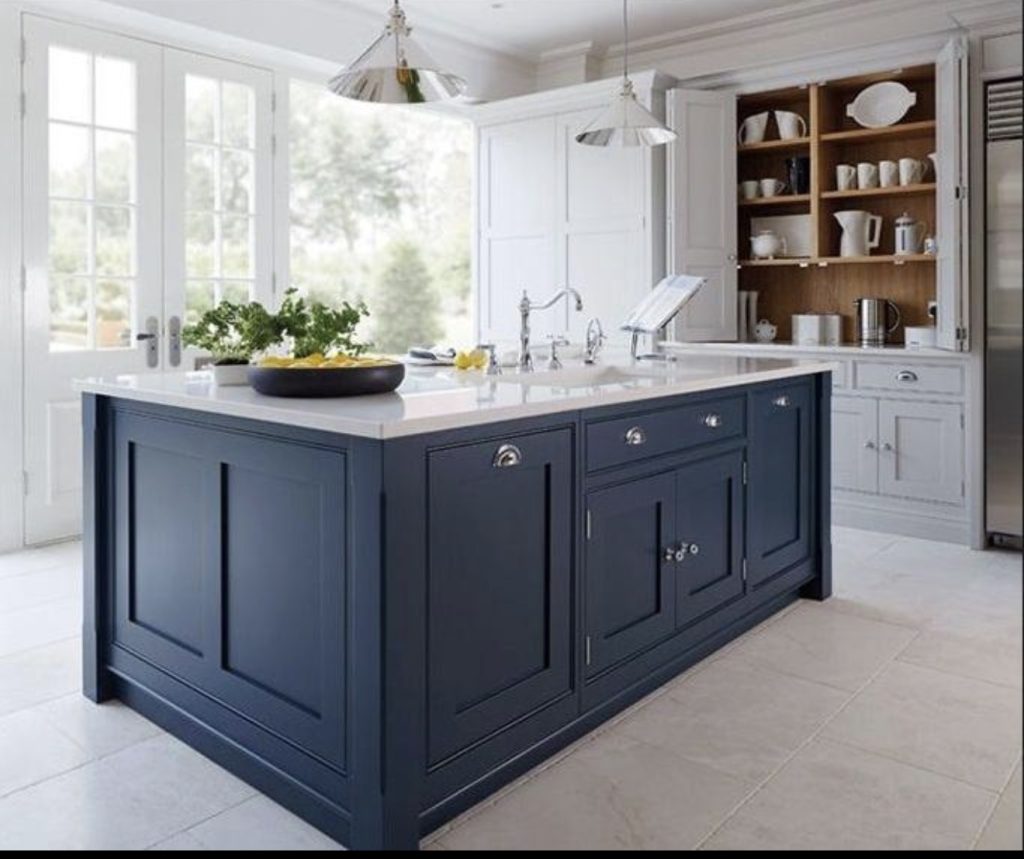
You can borrow that look for your kitchen island without replacing the cabinets.
This idea is especially useful if you already have Shaker-style kitchen cabinet doors. Adding matching square panels to the island can help the whole kitchen feel coordinated.
How to create the look on a budget
Start by checking whether your island has flat side panels. If it does, you can create the appearance of recessed or framed panels using inexpensive square-edged trim.
Plan a series of rectangular frames. Keep the corners square and the trim widths consistent. You might use one large frame in the center or two smaller frames on each exposed side.
Attach the trim, fill the joints, and sand everything smooth. Then apply primer and paint.
For a traditional kitchen, try warm white or cream. For a more modern look, consider a dark navy, forest green, or deep gray island paired with lighter cabinets.
You can also use the same color throughout the kitchen if you want a subtle, built-in appearance.
Budget tip: Choose plain, flat trim instead of decorative molding. The Shaker look depends on clean lines, so expensive profiles aren’t necessary.
If your island has a textured surface, test the trim and paint on a small area first. You may need a smooth backing panel to achieve a neat finish.
This is one of the best options for anyone who wants the island to look custom while keeping the design understated.
Check out these farmhouse kitchen island decor ideas many women like.
7. Use Decorative Pole-Wrap Panels for a Budget-Friendly Textured Island
Want something a little different from traditional wainscoting? Try pole-wrap panels.
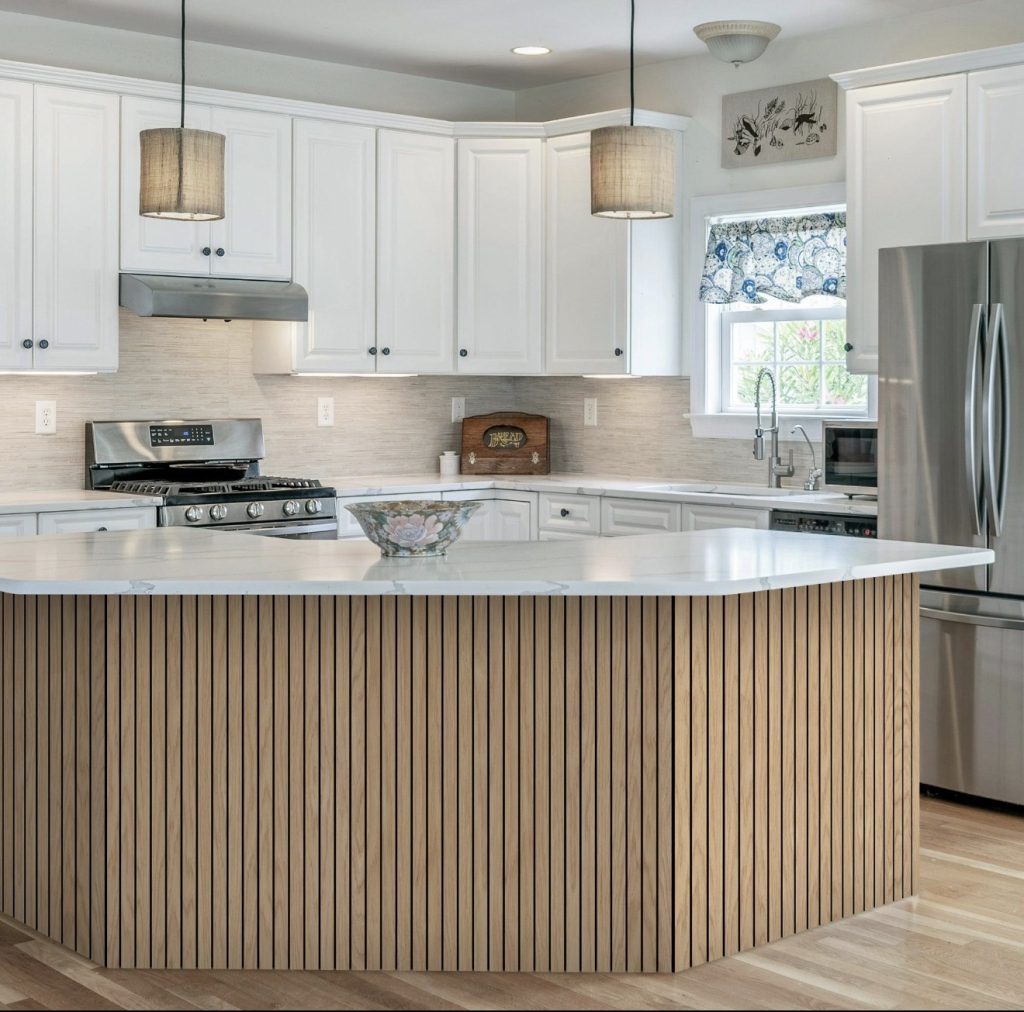
Pole wrap is a flexible material made with narrow wooden strips attached to a backing. It is commonly used to cover round columns, but it can also add texture to a kitchen island when the product is suitable for the surface.
The closely spaced strips create a fluted or slatted appearance. This look works beautifully in contemporary, Scandinavian-inspired, and modern organic kitchens.
It is a good option if you want your island to feel more like a stylish furniture piece.
How to create the look on a budget
Measure the island’s exposed side and check how much panel material you’ll need. Look for affordable pole-wrap products or similar narrow wood slat panels.
Cut the material carefully to fit the area. Follow the manufacturer’s instructions for attaching it to a flat surface, and make sure the backing is compatible with your island’s material.
You can leave a natural wood finish for warmth or paint it to coordinate with your cabinets. If you choose a natural finish, test a small piece first to see how the color works with your flooring and countertops.
Budget tip: Use pole wrap on one side of the island rather than covering every surface. A single textured panel can become a beautiful focal point.
Keep in mind that the narrow grooves can collect dust and cooking residue. Choose a finish that can be cleaned easily, and avoid placing untreated wood near areas where it may get wet.
8. Paint a Faux Wainscoting Design With Minimal Trim
If you want to spend as little as possible, consider creating a simplified faux-wainscoting look.
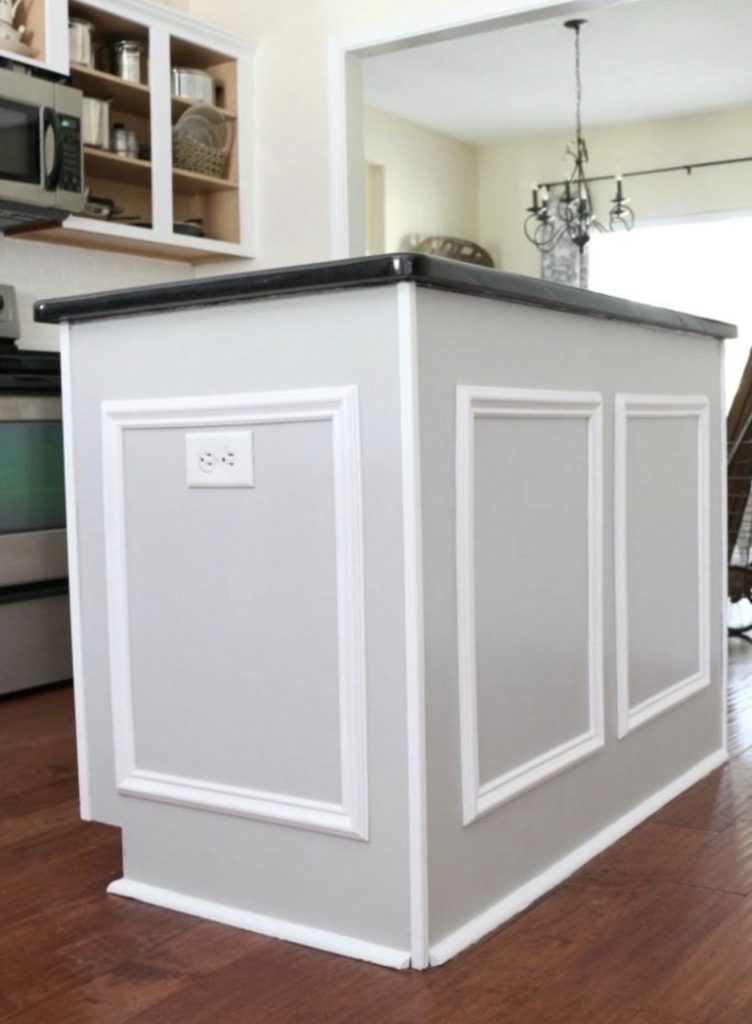
This approach uses paint and a small amount of trim to create the appearance of decorative panels. It is ideal for anyone who doesn’t want to buy full sheets of paneling or spend a lot of time cutting complicated designs.
It also gives you room to experiment with color before committing to a more elaborate makeover.
How to create the look on a budget
First, clean the island and make sure the existing finish is in good condition. Lightly sand where appropriate, then use a suitable primer if the surface requires it.
Choose a paint color that complements the rest of your kitchen. Mark out rectangular shapes with painter’s tape to test your layout before adding trim.
For a simple framed appearance, attach narrow molding around the rectangles. If you want an even more minimal effect, you can use paint alone to create subtle color-blocked panels, although the result won’t have the same raised texture as traditional wainscoting.
Once the design is complete, apply a durable cabinet or trim paint suitable for your surface.
A soft cream island with slightly darker painted rectangles can look elegant. You could also use one solid shade, such as dusty blue or olive green, and let the trim provide the detail.
Budget tip: Work with your island’s existing shape instead of adding a complicated new design. Fewer cuts mean less wasted material and less work.
This is a great starting point for beginners who want to try a small DIY project before tackling a more involved installation.
How to Save Money on DIY Kitchen Island Wainscoting
You don’t need to spend a fortune to get a beautiful finish. A few smart choices can keep your project affordable.
- Measure before shopping. Calculate the area you want to cover and plan the layout before purchasing materials. This helps reduce waste.
- Choose one focal surface. If your budget is tight, start with the back of the island or the side facing your dining area.
- Use simple molding. Plain trim is often less expensive than ornate decorative profiles and suits many kitchen styles.
- Reuse what you can. If you already own basic tools, sandpaper, or a suitable paintbrush, you may not need to buy replacements.
- Compare material prices. Check local home improvement stores for trim offcuts, smaller panel sheets, and discounted materials.
- Don’t skip preparation. Cleaning, filling gaps, sanding, and priming where needed can help the finished work look neater and last longer.
Remember that your total cost will depend on the island’s size, your material choices, and whether you already own the tools. You can keep costs lower by choosing a simple design and doing the work yourself, but measure your specific project before setting a budget.
A Few Things to Know Before You Start
Before attaching any panels or molding, check that your island’s surface is suitable for the material you plan to use.
Remove grease and dirt so the adhesive or primer can bond properly. If the surface is laminate or another slick finish, use a preparation method and primer approved for that material.
Pay special attention to the bottom edges of the island. They can be exposed to spills, wet mops, and everyday bumps. Regular MDF can swell when it absorbs water, so use moisture-tolerant materials where appropriate and seal exposed edges.
Also, check the countertop overhang and floor clearance before adding trim. You don’t want the new panels to interfere with seating, drawers, cabinet doors, or toe-kick space.
If you are unsure how to attach the materials securely, consult the product instructions or a qualified professional. A beautiful finish should also be safe and durable.
Frequently Asked Questions
How do you add wainscoting to a kitchen island?
Start by measuring the exposed sides of the island and choosing a design, such as beadboard, picture frame molding, or board and batten. Clean and prepare the surface, cut your materials to size, and attach them using compatible adhesive and fasteners. Fill gaps, sand, p